Downgrading S.T.A.L.K.E.R.: Shadow of Chernobyl to 1.0005

Not long ago I decided to go back to the Zone and do some casual stalking. But my game was updated in 2013 to 1.0006 and the complete mod I used just broke.

Disclaimer

This only works for the English version. You are responsible for anything that could happen including, but not limited to, radioactive fallout, mutants appearing and the Monolith trying to recruit your family.

If you’re not playing the English version please move on or buy one on Steam or GOG.

Downgrading to 1.0005

To downgrade the game to 1.0005 we are going to trick the 1.0005 patch into thinking it’s updating from 1.0004 in the registry, then we will install the official 1.0005 patch.

First you will need to navigate into the registry and locate the key:

HKEY_LOCAL_MACHINE\SOFTWARE\Wow6432Node\GSC Game World\STALKER-SHOC

Set the string value InstallLang to en, if it doesn’t exist create it.
Set the string value InstallVers to 1.0004, if it doesn’t exist create it.
Set the string value InstallSource to stk-for-pack-noprot-efis, if it doesn’t exist create it.

Now download the 1.0005 patch:

Install it and disregard the error message about the readme file, we will now how to move the files manually.

Navigate to C:\Program Files (x86)\THQ\S.T.A.L.K.E.R. - Shadow of Chernobyl with your file explorer and copy the following folders and files to your game installation folder:

  • bin;
  • mods;
  • gamedata.dbb;
  • gamedata.dbc.

My game folder is located at D:\Steam\SteamApps\common\STALKER Shadow of Chernobyl.

The last step is to delete an unwanted file that was installed with 1.0006. Delete gamedata.dbd in the game folder. You can now go back to the Zone!

Source: https://www.gog.com/forum/stalker_series/downgrade_instructions

Use more than 2GB of RAM

You will need to patch the XR_3DA.exe file. Download this and extract it into the game’s bin folder:
http://www.moddb.com/mods/stalker-complete-2009/downloads/stalker-soc-3gb-ram

Before doing anything you must always think about making a backup, in this case you can zip the file we are about to patch so you have a copy just in case.

Copy XR_3DA.exe into the extracted folder, run Start.bat and follow the instructions. Once the game binary patched copy it back to the bin folder.

This will help with mods.

90° FOV

The modification can and will most certainly ban you from multiplayer!

For a wider field of view you will have to go to the S.T.A.L.K.E.R.: Shadow of Chernobyl page on the PCGaming Wiki and go down to the Field of View section.

You will be prompted to download an archive, from that archive you will need to extract to the bin folder the file fov90_v10005.exe. Once extract it launch it once so it patched the game.

Enjoy!

Asus ROG G750JM: Defective by design

Republic of Gamers

Update 18/07/2017: BSoD reported with nVidia drivers WHQL (dated 29/06/2017) to me (in French) and fixed by applying Asus’ drivers. See conclusion.

If we ever have to speak about the looks, the form factor and the cooling system, I’d have to say that I love the Asus ROG (Republic of Gamers) laptop G750JM.

But it has issues. It actually has a number of issues you can’t overlook.

Technical specification

Its specs are not the best, but good enough to be able to run multiple VMs, the Witcher 3 and enjoying desktop like performance on just about any tasks. Not high-end desktop like performance, but not far from it.

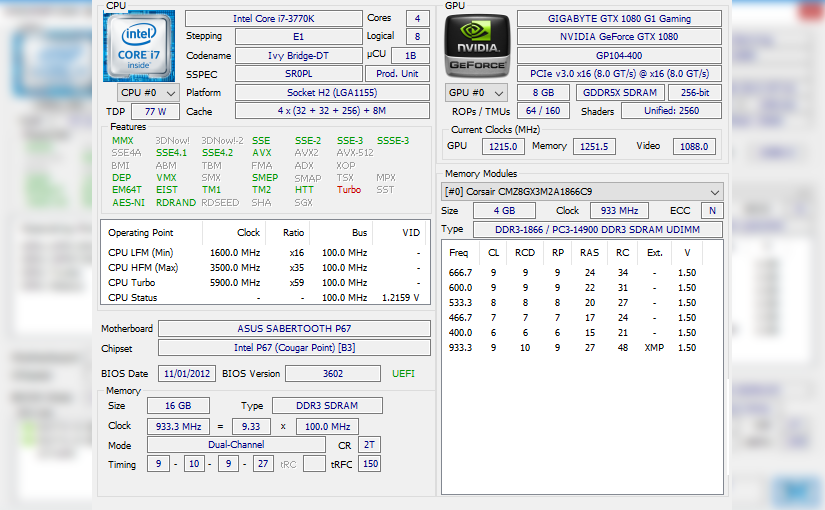
  • CPU: Intel i7 4700HQ 2.4GHz;
  • RAM: 16GB;
  • GPU: NVIDIA GTX 860M (2GB);
  • Storage: 1To Hitachi Travelstar 7K1000;
  • Windows 8.1 Pro 64bits.

For the operating system I have installed my own license of Windows 8.1, just to make sure I don’t have to live with the bloat it comes with. No overclocking was involved at any moment, it’s still a laptop so I’d like to maximize its lifespan.

Blue Screen of Death: DRIVER_POWER_STATE_FAILURE 0x9F

Ever since I have owned this laptop, I remember having systematic Blue Screens of Death (DRIVER_POWER_STATE_FAILURE) when Geforce Experience was installed and Shadow Play was enabled at startup. I have since then removed Geforce Experience to not experience any BSoDs at startup.
I never go to understand the issue. I have since then never installed Shadow Play ever again, and I actually would like to be able to record gaming footage…

But recently I have been experiencing those BSoDs again. Strange since I didn’t update the NVidia driver in a long time (version 353.06). I could take a look at a crash dump.

The good thing about running into issues is that it’s the perfect time to learn stuff such as using WinDbg. With just a few commands I can find out what went wrong… Or get to close to know.

This is the debugging process:

*******************************************************************************
*                                                                             *
*                        Bugcheck Analysis                                    *
*                                                                             *
*******************************************************************************

Use !analyze -v to get detailed debugging information.

BugCheck 9F, {3, ffffe000e61bd060, ffffd0011789c960, ffffe000e546a010}

Probably caused by : pci.sys

Followup: MachineOwner
---------

2: kd> k
Child-SP          RetAddr           Call Site
ffffd001`1789c928 fffff802`a4e92782 nt!KeBugCheckEx
ffffd001`1789c930 fffff802`a4e926a2 nt!PopIrpWatchdogBugcheck+0xde
ffffd001`1789c990 fffff802`a4d302d8 nt!PopIrpWatchdog+0x32
ffffd001`1789c9e0 fffff802`a4dde7ea nt!KiRetireDpcList+0x4f8
ffffd001`1789cc60 00000000`00000000 nt!KiIdleLoop+0x5a
2: kd> !analyze -v
*******************************************************************************
*                                                                             *
*                        Bugcheck Analysis                                    *
*                                                                             *
*******************************************************************************

DRIVER_POWER_STATE_FAILURE (9f)
A driver has failed to complete a power IRP within a specific time.
Arguments:
Arg1: 0000000000000003, A device object has been blocking an Irp for too long a time
Arg2: ffffe000e61bd060, Physical Device Object of the stack
Arg3: ffffd0011789c960, nt!TRIAGE_9F_POWER on Win7 and higher, otherwise the Functional Device Object of the stack
Arg4: ffffe000e546a010, The blocked IRP

Debugging Details:
------------------


DRVPOWERSTATE_SUBCODE:  3

IMAGE_NAME:  pci.sys

DEBUG_FLR_IMAGE_TIMESTAMP:  53d0f1d4

MODULE_NAME: pci

FAULTING_MODULE: fffff80107fae000 pci

DEFAULT_BUCKET_ID:  WIN8_DRIVER_FAULT

BUGCHECK_STR:  0x9F

PROCESS_NAME:  System

CURRENT_IRQL:  2

ANALYSIS_VERSION: 6.3.9600.17237 (debuggers(dbg).140716-0327) amd64fre

DPC_STACK_BASE:  FFFFD001178A3FB0

STACK_TEXT:  
ffffd001`1789c928 fffff802`a4e92782 : 00000000`0000009f 00000000`00000003 ffffe000`e61bd060 ffffd001`1789c960 : nt!KeBugCheckEx
ffffd001`1789c930 fffff802`a4e926a2 : ffffe000`e546af08 00000000`00000001 ffffe000`ea7417e0 fffff802`a4d2e391 : nt!PopIrpWatchdogBugcheck+0xde
ffffd001`1789c990 fffff802`a4d302d8 : 00000000`00000000 ffffd001`1789cae0 00000000`00000001 00000000`00000001 : nt!PopIrpWatchdog+0x32
ffffd001`1789c9e0 fffff802`a4dde7ea : ffffd001`17872180 ffffd001`17872180 ffffd001`1787e3c0 ffffe000`ed531080 : nt!KiRetireDpcList+0x4f8
ffffd001`1789cc60 00000000`00000000 : ffffd001`1789d000 ffffd001`17897000 00000000`00000000 00000000`00000000 : nt!KiIdleLoop+0x5a


STACK_COMMAND:  kb

FOLLOWUP_NAME:  MachineOwner

IMAGE_VERSION:  6.3.9600.17238

FAILURE_BUCKET_ID:  0x9F_3_ACPI_IMAGE_pci.sys

BUCKET_ID:  0x9F_3_ACPI_IMAGE_pci.sys

ANALYSIS_SOURCE:  KM

FAILURE_ID_HASH_STRING:  km:0x9f_3_acpi_image_pci.sys

FAILURE_ID_HASH:  {20ddeb92-07eb-ebdc-bd08-44da71ffbd68}

Followup: MachineOwner
---------

2: kd> !irp ffffe000e546a010
Irp is active with 6 stacks 4 is current (= 0xffffe000e546a1b8)
 No Mdl: No System Buffer: Thread 00000000:  Irp stack trace.  
     cmd  flg cl Device   File     Completion-Context
 [  0, 0]   0  0 00000000 00000000 00000000-00000000    

      Args: 00000000 00000000 00000000 00000000
 [  0, 0]   0  0 00000000 00000000 00000000-00000000    

      Args: 00000000 00000000 00000000 00000000
 [  0, 0]   0  0 00000000 00000000 00000000-00000000    

      Args: 00000000 00000000 00000000 00000000
>[ 16, 2]   0 e1 ffffe000e61b1240 00000000 fffff80107fb3b30-ffffe000e61ff730 Success Error Cancel pending
         \Driver\ACPI	pci!PciBusPowerUpCompletion
      Args: 00000000 00000001 00000001 00000000
 [ 16, 2]   0 e1 ffffe000e61ff5e0 00000000 fffff802a4da91cc-ffffe000e546af08 Success Error Cancel pending
         \Driver\pci	nt!PopRequestCompletion
      Args: 00000000 00000001 00000001 00000000
 [  0, 0]   0  0 00000000 00000000 00000000-ffffe000e546af08    

      Args: 00000000 00000000 00000000 00000000

I get to understand a few things from it:

  • Line 11: pci.sys might have caused the BSoD;
  • Line 33 & 34: A physical device object blocked an IRP for too long;
  • Line 36: The block IRP.

What’s actually interesting is the line 36: ffffe000e546a010. At line 91 I run a command with that IRP number:

2: kd> !irp ffffe000e546a010
Irp is active with 6 stacks 4 is current (= 0xffffe000e546a1b8)
 No Mdl: No System Buffer: Thread 00000000:  Irp stack trace.  
     cmd  flg cl Device   File     Completion-Context
 [  0, 0]   0  0 00000000 00000000 00000000-00000000    

      Args: 00000000 00000000 00000000 00000000
 [  0, 0]   0  0 00000000 00000000 00000000-00000000    

      Args: 00000000 00000000 00000000 00000000
 [  0, 0]   0  0 00000000 00000000 00000000-00000000    

      Args: 00000000 00000000 00000000 00000000
>[ 16, 2]   0 e1 ffffe000e61b1240 00000000 fffff80107fb3b30-ffffe000e61ff730 Success Error Cancel pending
         \Driver\ACPI	pci!PciBusPowerUpCompletion
      Args: 00000000 00000001 00000001 00000000
 [ 16, 2]   0 e1 ffffe000e61ff5e0 00000000 fffff802a4da91cc-ffffe000e546af08 Success Error Cancel pending
         \Driver\pci	nt!PopRequestCompletion
      Args: 00000000 00000001 00000001 00000000
 [  0, 0]   0  0 00000000 00000000 00000000-ffffe000e546af08    

      Args: 00000000 00000000 00000000 00000000

The entry that is marked is the one on the line 14. It mentions on line 51 that IRP’s driver is \Driver\ACPI. ACPI is what puts some components to sleep and does status monitoring. What could possibly be the issue and how is it related to Nvidia ?

I don’t know. Reports on the internet have pointed at some feature called Turbomaster being the culprit. Disabling it in the UEFI should fix the issue according to reports from people online. It did not for me.

Let’s check the most recent BSoD:

*******************************************************************************
*                                                                             *
*                        Bugcheck Analysis                                    *
*                                                                             *
*******************************************************************************

Use !analyze -v to get detailed debugging information.

BugCheck 9F, {3, ffffe000842c7410, ffffd0002609c960, ffffe00084f9dca0}

Probably caused by : pci.sys

Followup: MachineOwner
---------

2: kd> !irp ffffe00084f9dca0
Irp is active with 6 stacks 4 is current (= 0xffffe00084f9de48)
 No Mdl: No System Buffer: Thread 00000000:  Irp stack trace.  
     cmd  flg cl Device   File     Completion-Context
 [  0, 0]   0  0 00000000 00000000 00000000-00000000    

      Args: 00000000 00000000 00000000 00000000
 [  0, 0]   0  0 00000000 00000000 00000000-00000000    

      Args: 00000000 00000000 00000000 00000000
 [  0, 0]   0  0 00000000 00000000 00000000-00000000    

      Args: 00000000 00000000 00000000 00000000
>[ 16, 2]   0 e1 ffffe000842c7410 00000000 fffff8015a4a837c-ffffd000205ea8c0 Success Error Cancel pending
         \Driver\pci	dxgkrnl!DpiFdoPowerCompletionRoutine
      Args: 00000000 00000001 00000001 00000000
 [ 16, 2]   0 e1 ffffe000847a31f0 00000000 fffff802715201cc-ffffe0008709fea8 Success Error Cancel pending
        *** ERROR: Module load completed but symbols could not be loaded for nvlddmkm.sys
 \Driver\nvlddmkm	nt!PopRequestCompletion
      Args: 00000000 00000001 00000001 00000000
 [  0, 0]   0  0 00000000 00000000 00000000-ffffe0008709fea8    

      Args: 00000000 00000000 00000000 00000000
2: kd> !sysinfo machineid
Machine ID Information [From Smbios 2.7, DMIVersion 39, Size=1687]
BiosMajorRelease = 4
BiosMinorRelease = 6
BiosVendor = American Megatrends Inc.
BiosVersion = G750JM.207
BiosReleaseDate = 07/17/2014
SystemManufacturer = ASUSTeK COMPUTER INC.
SystemProductName = G750JM
SystemFamily = G
SystemVersion = 1.0       
SystemSKU = ASUS-NotebookSKU
BaseBoardManufacturer = ASUSTeK COMPUTER INC.
BaseBoardProduct = G750JM
BaseBoardVersion = 1.0

Why is \Driver\pci the issue ?
Well it’s time to rollback, like suggested here, to the OEM drivers to be sure I’m not going to have anymore issues. Version 347.52 from the 2nd of April 2014!

Damaging SATA controller

What’s great about the G750JM is that is has two 2.5″ bays, one is already populated with a 1TB hard drive (Hitachi Travelstar 7K1000). That’s a great opportunity to put another 1TB drive in the other bay so I can double my storage !

Except no. The SATA controller seems to damage hard drives put in the second bay. I got no response from Asus’ support team regarding that issue. When I RMA’d the laptop they changed the motherboard (on wich the SATA controller sits ?), I ran through 4 hard drives of the same brand as the one that came with the laptop in the second bay.
They all ended up dying. And more often than not, not even reporting S.M.A.R.T. issues. Something is wrong, and it’s not the hard drives causing issues.

So I started thinking… Maybe I’m the only one experiencing this issue. Well I’m not really the only one actually. That might not mean much.

Asus’ support

Let’s rant a bit. I have been contacting the support since 2014 I believe. I have RMA’d this computer twice and it still damages the hard drives in the second bay, it still needs to be disassembled to rewire the screen correctly sometimes. It still Blue Screens with Nvidia’s drivers.

Is this Asus quality? How come I’ve had a flawless experience on a desktop computer with Asus but on a laptop I must pull out my hair?!

I have literally emailed Asus’ support team begging them to get the laptop repaired once and for all, begging them for the quality of service I believe every single customer deserves. Even when my warranty ended.

I have tried my best to diagnose issues, I have sent videos and logs. I have asked for help and nothing was ever done to help me. Instead it was always the kind of response where I would have to send the computer back and let them evaluate if the warranty covers the damages or not before doing anything.
Am I an idiot for trying to figure out what wrong and getting a fully functional laptop?

You tell me Asus.

Conclusion

The Asus ROG G750JM is a defective by design laptop. My motherboard, GPU, screen and “SATA cables” were changed during the first RMA. I then got a screen that have some of the worst burn in you could possibly ever have and it wasn’t even securely wired, so when the cable came loose the picture would just glitch.

While I think that customers don’t have to be treated as kings, I believe that quality should be a concern. Produce the best product and service possible to your customers.

It seems that the G552VW model has kind of the same problem for the nVidia driver, I have done some support (in French) about a BSoD happening. The BSoD happened in Phantasy Star Online 2.
Installing the old drivers from the Asus’ support site resolved the instant BSoD that he would get a few seconds after loading the game. I see a pattern.

Formatting hexdump’s output

hexdump is a tool used to dump a file (or whatever is piped to it) as a hex file. I personnally like using it with the “canonical” (hex + ASCII) options like this:

https://gist.github.com/SenpaiSilver/84f1f755ee3cc426ad503f856ee81351

While reading the man I saw I could specify a format (-e) or a format file (-f) to change the output. Great!
I can actually control what I want to see.

Understanding the output

A format file is just like your regular file. We will now try to recreate the “canonical” output. First of all we need to analyse what output provides and how:

hexdump -C Made_in_paint_with_love

We can see that there are 3 sections:

  • Offset;
  • Hex data;
  • ASCII data.

The Offset is 8 characters wide, the hex data is 48 characters wide and the ASCII data is 16 characters wide or 18 characters wide with the separators. Each section is separated by a set of two spaces, same goes for the hex data that is separated in half.

The number of leading zeros in the offset is 8, and in the hex data is 2.
This is particularly important so we can get the padding right.

Creating the format file

Use your favorite text editor and/or operating system. I won’t judge you.
The best way to reproduce the same output is to use the same input, so start writing your favorites quotes from your favorite shows.
I’ll be using some data I got from sniffing Republic Commando‘s sockets.

It’s good to be familiar with the printf formatting values.

The first element we need to show is the offset which can be achieved by using the magic value _ax. Values that are printed must be surrounded by quotes. Since we are printing hex numbers in the hex section we will use 02h so that we have a hex number that will always be 2 characters long, even if it’s null.
For the ASCII section we will use _p.

https://gist.github.com/SenpaiSilver/1b22768ccaca7bb1dbd6dd8ed7b93415

Close enough. The offset needs leading zeros. Let’s put 8 leading zeroes like for the hex variable. Let’s also adjust the padding on the ASCII section.

https://gist.github.com/SenpaiSilver/feec6274663338d82a8cea0b2174579a

That’s very close. But we don’t have the last line from the “canonical” output, the _Ax value. And we’re missing the padding cutting the hex data in half. To cut data in half we can print each half separately.

https://gist.github.com/SenpaiSilver/f0af132b6f85cf910654ffd074ea7ef6

That’s it!

Going further

There is not much to say. This is what the “canonical” output prints. The hardest part was probably understanding how to use the buffer.

https://gist.github.com/SenpaiSilver/7738556f3552505a48f89eb466bcf6c3

This is the final format file. Instead of using hard-coded padding it is possible to specify the padding before the leading zeros as such: "%3.02x" will be equivalent to " %02x".

We are also printing each byte by specifying 8/1 wich translates to print the next 8 values as groups of 1 byte. By writing 8/2 you are grouping the 16 next values, grouping them by 2 and printing each group.
This is manipulating the input as blocks of arbitrary length.

Slack and HexChat

Slack is great for chatting with your team and you should use it when managing a team with Hangouts or Skype isn’t enough.

HexChat is certainly the best IRC client for Windows.

Enabling IRC gateway

To enjoy Slack on HexChat or any other IRC client you need to to enable IRC gateway you must go to your settings:

https://<your_team>.slack.com/admin/settings#gateways

Tick “enable IRC gateway” then go to your account settings to find your credentials:

https://<your_team>.slack.com/account/gateways

Screenshot (285)

Setting up HexChat

Those settings will be useful for when you add a new server to connect on your IRC client. You’ll need to untick the “use global user information” checkbox and the pass needs to be entered into the password text box with login method set to default in hexchat.

You’ll also have to enable SSL if your gateway is SSL only.

Screenshot (286)

Once set, connect and enjoy.

Star Wars: Republic Commando

Star Wars: Republic Commando is my favorite Star Wars game, the main theme is Vode An.

This game came out in 2005, and was by LucasArts (they’ll be missed). In the game you’re a soldier fighting for the republic with a couple teammates !
There are spoilers following.

Geneosis

You start in Geneosis, just like in Clone Wars. You simply have to follow the linear story without really bothering about the several droids or oversized toasters.
It’s like they can really hurt you with your shield on.

You’re the commander of Delta squad and your “name” is RC-1138. You’re team is composed of 3 other members with nicknames: Scorch (RC-1162), Sev (RC-1207), Fixer (RC-1140).

Prosecutor

After Geneosis you will investigate the Prosecutor, a spacecraft than went silent. Nothing really new since the game is still like a corridor.
The difference is about how you command your squad.

Kashyyyk

This is the last chapter, you’ll be visiting Kashyyyk since the wookies need your help. You’ll even catch a glimpse of General Grievous’ face and fight his guard while hunting down some Trandoshans.

Multiplayer

Even if the multiplayer is not as played as Dota 2, Counter-Strike or any other games, it wasn’t half bad. Like for modern military shooters you had a primary weapon and a secondary, you had the three types of grenades from the story mode.
You also had to pick a side Republic or Trandoshan.

The game can still be fun with other people, but you’ll need to connect with an IP.

RollerCoaster Tycoon

UPDATE 2020/03/04: Yo check out OpenRCT2!

RollerCoaster Tycoon was made by Chris Sawyer at the end of the 90s. This game is about maintaining an amusement park, building rides, building food stores…
It’s about YOUR amusement park !

The game was written in assembly and C (to interface with Windows) and can be played on today’s up to date Windows 8.1 64bit with the GoG’s version.

Can my toaster run this ?

Yes it can !
To run this game you’ll need Windows 95 or newer, a 90MHz CPU.
You’ll also need 1MB of video memory and 16MB of RAM, your toaster should run this game fine.

Play it in windowed mode

Since it’s an old game, I highly suggest you to play it in windowed mode. You might encounter some glitches when ALT-TABing or trying to click out of the window to do something with another app whithout having the click be registered.
The workaround is to right click RollerCoaster Tycoon title bar on the windows and then click out of the window.

Obviously ALT-TABing with your keyboard will work just fine.

The worst anti-cheat: GameGuard

Phantasy Star Online 2: The GameGuarding

Update (04/05/2016): It seems that most of the issues don’t occur anymore. It has been like that for a month or two. While I doubt about how effective it is, I know that there are mods that can hook into the game so maybe GameGuard is just being more tolerant on our systems.

GameGuard is often bundled with Free 2 Play games especially when they’re Asian games. But it’s trash.

I play Phantasy Star Online 2 and it’s bundled with it.

What is GameGuard?

GameGuard is produced by nProtect and is supposed to be one of many anti-cheat software.

Its main job is to hide the game’s process. It seems to make sure that some DLL don’t get loaded by the game or any other app.

The issues I experienced

I have experienced a few issues, some have had me reinstall my system and some have just given me headaches.

The issues I had were generally:

  1. No process can be spawned (start menu, desktop icon, run prompt);
  2. No console, such as cmd.exe or cygwin, can be opened;
  3. No process in cygwin can be spawned (could not fork);
  4. GameGuard does not end when the game is closed and I can’t restart the game because GameGuard doesn’t want me to spawn another GameGuard;
  5. Google Chrome doesn’t work;
  6. Can’t reboot (can’t spawn shutdown.exe ?);
  7. My DNS breaking and not accepting domains I don’t have in cache;
  8. Some software will crash when started:
    • Google Chrome;
    • Media Player Classic (CCCP);
    • hexchat.

The list goes on.

Mailing the support

I once contacted the nProtect’s support because my issue was going nowhere. This was the mail I sent:

To: support@nprotect.com
Subject: Issue with GameGuard not closing after game ends

Hi,

I’m currently having an issue with GameGuard for Phantasy Star Online 2 (PSO2). Everytime I play PSO2 and finish I must reboot my computer (sometimes do a hard reboot) because the “GameMon64.des” process does end when the game is closed.

I know it doesn’t end because when I relaunch the game, the new “GameMon64.des” process that was spawned doesn’t hide the game’s or GameGuard’s process and is the only process to not end once I’m greeted with a “np1002” error.

If I try to kill the process I’m notified that I don’t have the required permissions for that (which I do have since I have admin powers).

I have tried deleting the whole GameGuard folder everytime I launch the game and nothing changed.

I’m running Windows 8.1 64bit and Kaspersky.

What can I do to not have anymore issues ?

Thanks.

I never got a response but after a while the issue was gone.

Conclusion

I hate GameGuard, it doesn’t stop cheating and people can still inject DLLs anyway so what’s the point?

I’ll still use it because I have no choice if I want to play PSO2.

Playing Star Wars: Battlefront 2 online

SW_BF2-header

With the new Star Wars Battlefront being teased and disappointing people, you can still play the old Battlefront 2 online even without GameSpy.

The easy steps

  • Go to the download page;
  • Download the corresponding archive, “BattlefrontII_1.1_europe_clientfiles_english.zip” was the one I downloaded for me;
  • Extract it to the game folder “\Steam\SteamApps\common\Star Wars Battlefront II\GameData”;
  • In-game: create an account like if it was a GameSpy one;
  • Execute order 66.

Source: http://pcgamingwiki.com/wiki/Battlefront_2