List all variables and arguments in Streamer.bot and use them

Streamer.bot is a great piece of software but it comes with some caveats: scripting is tedious. I use Streamer.bot for my own streams and I have enjoyed scripting some events.

This software is missing some pretty important debugging tools and Streamer.bot is not open source. I would have thrown in some of my improvements so I might instead get to writing plugins.

Inspecting all the variables a script can use

First, what I’m calling variables in this context is not actually variables, the documentation refers to these as arguments. But since I’ll be using them as variables, that have been set by previous actions, I will be referring to them as variables.

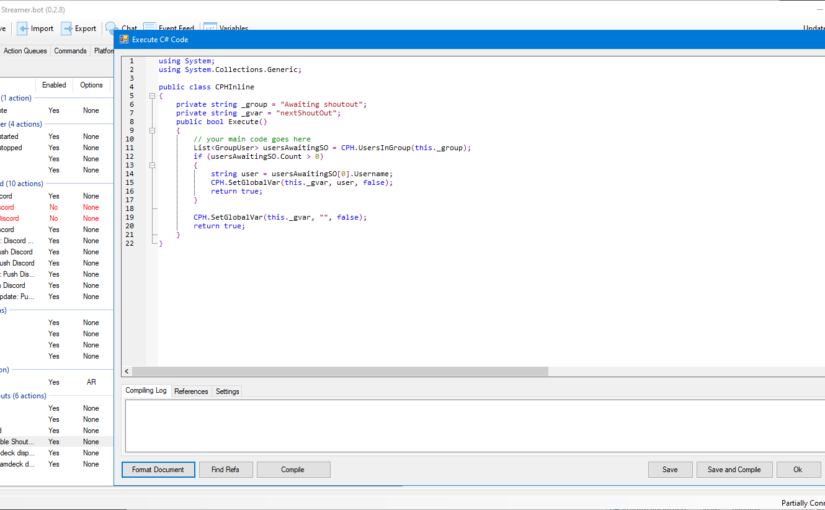
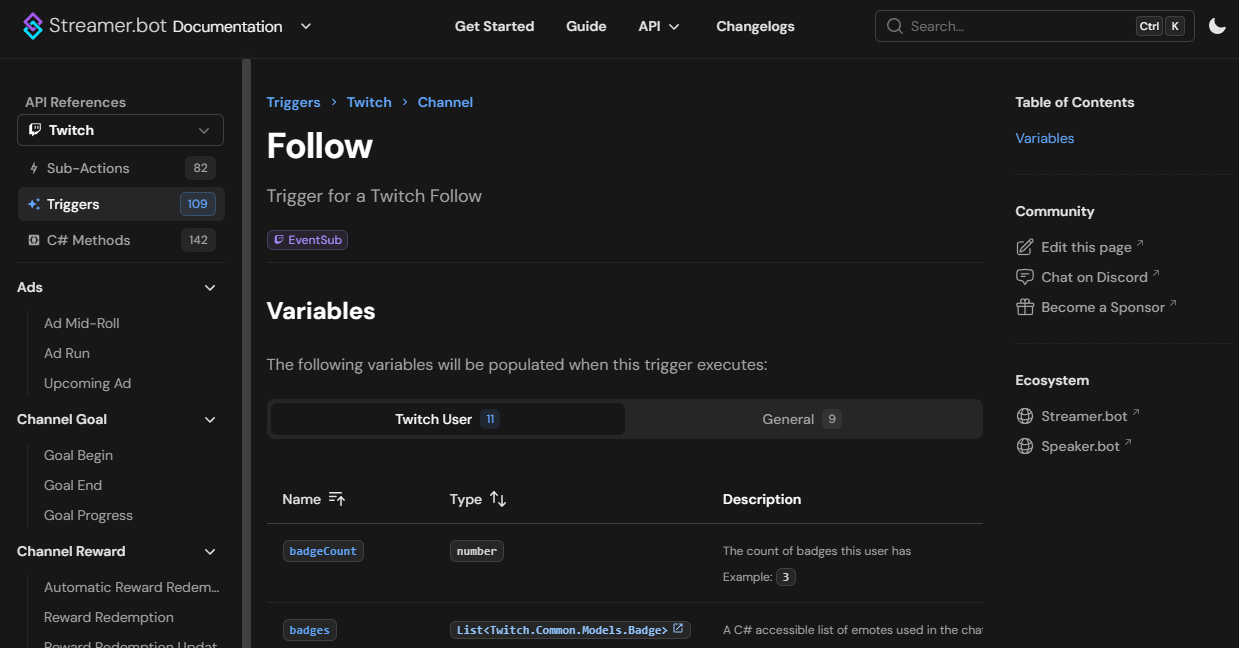
My main issue with C# script in Streamer.bot is that you cannot inspect variables easily. The documentation sometimes is incomplete and doesn’t list the variables that are available to you or sometimes it just displays a blank page.

The great thing about scripting, when you know what you are looking for, is that you can print to the log file whatever information you need:

using System;

public class CPHInline
{
    public bool Execute()
    {
        CPH.LogInfo("LogVars::Start");
        foreach (var arg in args)
        {
            CPH.LogInfo($"LogVars::{arg.Key} = {arg.Value}");
        }
        CPH.LogInfo("LogVars::End");

        return true;
    }
}

The output will look like (some lines were truncated):

[2024-04-29 07:29:31.736 DBG] InlineCode :: Running 'Execute' entry point from instance '5ded116b-fc1e-4ecf-9627-3055d1965acd'
[2024-04-29 07:29:31.752 INF] LogVars::Start
[2024-04-29 07:29:31.752 INF] LogVars :: __source = ElgatoWaveLinkMicrophoneMuteChanged
[2024-04-29 07:29:31.752 INF] LogVars :: microphoneName = Elgato Wave XLR
[2024-04-29 07:29:31.753 INF] LogVars :: microphone.name = Elgato Wave XLR
[2024-04-29 07:29:31.753 INF] LogVars :: microphone.gain = 0.75
[2024-04-29 07:29:31.753 INF] LogVars :: microphone.muted = True
[2024-04-29 07:29:31.753 INF] LogVars::End

You will then be able to access those variables through the TryGetArg function as such:

using System;

public class CPHInline
{
    public bool Execute()
    {
        bool muted = false;
        CPH.TryGetArg<bool>("microphone.muted", out muted);
        if (muted)
        {
            // Do something for a muted mic
        }

        return muted;
    }
}

The old documentation kindly refers to this snippet of code because I sure as hell wouldn’t come up with it.

Arguments VS variables

What Streamer.bot calls arguments can also be somewhat called variables. My opinion is that it can be confusing for those not in the know and I’ve set global variables in places where I didn’t think about using the arguments.

It’s fine because it works, but is it the proper way? No and I should make the switch where appropriate to make things run as they should be.

The big difference is that the triggers will output arguments that can be surround by % to be used such as %username%, while global variables are surrounded by ~ such as ~username~ when you want to use them.

But I still think that arguments should just be called local variables.

The page about arguments and variables: https://docs.streamer.bot/guide/variables#types

Conclusion

Due to the lack of proper up to date documentation and debugging tool it’s tricky to inspect what’s happening in Streamer.bot.

This post was written months ago but I never published it because I stopped producing content. I think it’s only right for this to go out to all of you in case someone might need it.

Adding subtitles to your stream

Ever wanted to subtitle your stream in your language and add one or two other languages with automatic translation? Looks like there’s a tool for that.

Step 1: Setting up a Apps Script (Google)

Setting up the Apps Script start with creating a new script on Apps Script: https://script.google.com

In the editor you will need to paste the following code:

function doGet(e) {
  const params = e.parameter
  var translatedText = LanguageApp.translate(params.text, params.source, params.target);
  const output = ContentService.createTextOutput();
  output.setMimeType(ContentService.MimeType.JSON);
  output.setContent(translatedText);
  return output;
}

The code will need to be deployed by click on the deploy menu on the top left:

The app must be deployed as a web app:

In the form you must let anyone access it:

When it’s deployed you will be provided the app key, this is what you will need for the next steps:

Step 2: Setting up the page

This is where the fun begins. There’s a form that is totally in Japanese that will require a couple of edits to be usable. Go here to start filling the form: https://sayonari.coresv.com/ninshikiChan/20210822_config.html

In the input field for Google Script API-KEY paste the one from your Apps Script. If you didn’t copy the key in the previous step you can retrieve if by going into the editor, in the deploy menu you need to click on manage deployments and you’ll find it under deployment ID:

Change the languages you want to use lower on the page, feel free to use Google Translate to find out what is what:

On the bottom of the page you will find the URL that you can copy and paste in your web browser, Google Chrome might be the only supported browser at the time of writting.

Step 3: Setting up OBS

Now comes the less fun part. Since the web page needs to listen to your voice you will have to run the page in your own Google Chrome instance, I’m unsure if it works on other browser since I wasn’t able to make the web app perform every single time.

To set it up all you need is a window capture and some filters. If the content of the web browser doesn’t appear you might need to disable hardware acceleration.

For the filters I usually just crop the top and a bit of the bottom, then I apply a chroma key filter to remove the screen background:

Congratulations, you are know streaming while subtitling at the same time. Subs are the way to go and this is what it looks like:

Troubleshooting

Refreshing the tab might help making the web app work, but if your speech isn’t appearing on screen you should instead try closing and reopening your browser.

I kept the tab loaded before closing Google Chrome and when I opened it again it was working.

Once again this isn’t flawless and some words might appear wrong or be heard wrong, these are the limits of speech recognition. Unless we slap some machine learning over your accent.

It might also strain your performances and require relaunching Google Chrome once in a while.

Credits

This is basically a translation of a Japanese page that was shared with me: http://www.sayonari.com/trans_asr/index_asr.html

This is a very useful tool for hearing impaired viewers and to enable people to appreciate better a stream in another language.

Separate your audio streams for streaming on Windows

Streaming and recording video games is something I’ve been into, casually, for years (since 2006). Recording gameplay with audio usually includes all the system audio and this can be a problem.

Recording all system audio issue

Windows, your web browser and the game’s audio will play through the default device. That default device is usually your headphones or your speakers.

OBS and ShadowPlay usually record that default device, this is something we’ll have to change.

Virtual Audio Cable

I’m using Virtual Audio Cable (VAC). You can use the trial version, buy it or use an alternative virtual cable driver, this is all up to you.

Open the Virtual Audio Control Panel as an admin (always) and setup the desired number of lines. Each line will be setup to receive audio from certain apps depending on the usage you want.

I have the main line for gameplay, my Discord line to record people I’m talking to. I also have a third line for miscellaneous things and a fourth that I’m not using.
Ideally I would’ve have set one line specifically for gaming, but Windows 10 being what it is (and standards being what they are) it ain’t going to work like that.

To complete the audio setup I also need to output those lines to something and that something is my headphones. Each output line automatically inputs the sound into a virtual input too, that way you can listen to it.

Basically this is how things go:

  • Outputs:
    1. Headphones;
    2. Line 1: Main output (default output device);
    3. Line 2: Discord output;
    4. Line 3: Misc output.
  • Inputs:
    1. USB Microphone (default input device);
    2. Line 1: Main output mirrored as input into my headphone;
    3. Line 2: Discord output mirrored as input into my headphone;
    4. Line 3: Misc output mirrored as input into my headphone.

Windows 10 doesn’t remember

Like I said previously one problem that forces me to set the line 1 as the default output device is because Windows 10 can’t exactly remember correctly which app is outputting on which device.

This issue could also be the other way around where an app will have a different output selected but still output to the default device, I’m not sure why but answers would be appreciated.

OBS recording

OBS is a great piece of software that permits me to merge lines and split some too! This is perfect for recording gameplay and streaming (at the same time).

First we need to specify that we will be recording several tracks into our ouput in OBS, for that we need to go into the settings: File, then Settings.
From there we go into the Output section and select in Streaming the first audio track as the one we will be using for streaming like so:

As a bonus you can also use a different audio track for the VOD so you can have avoid having Spotify playing in the VOD (and avoid the DMCA).

In recording we need to tick all audio track to enable all audio tracksfor later:

Then of course we need to name them and change the audio bitrate if you desire:

In my case I have everything playing on track 1 since it is the default track.
Track 2 will contain the game audio or the main subject of the video/stream.
Track 3 is my voice, followed by track 4 with voices from Discord.

Having different tracks enables me to control what is output when I record and stream, this way I’m able to make audio commentary when preparing a video and after that replace that commentary with a carefully recorded one, while keeping the gameplay audio without altering it.

To select where what track plays it’s necessary to go into the Edit menu, then Advanced audio properties. Set the different inputs and outputs as you wish in the new window:

Keep the first track checked for all lines, check the other numbers as you need.

Troubleshooting: static/glitch audio

After a while if the computer is not rebooted for days it might happen that the audio fizzles, glitches or becomes static. This isn’t a good experience.

The fix consists in restarting Virtual Audio Cable or the audio service from the control panel (as an admin).